Navigating MySQL Workbench#
MySQL Workbench is MySQL’s official graphical interface for working with databases. It lets you do things like:
Connect to and manage MySQL servers
write/execute SQL queries
Explore data visually
export/import data easily
Step 1: Open MySQL Workbench
Step 2: You should see ‘Local instance’ under MySQL Connections. If you don’t, follow these steps:
Click the plus beside MySQL Connections
Give the connection a name like ‘Local Instance’
Click on Store in Keychain … or Store in Vault … to enter the password made during installation
Test the connection and click OK
Every time you open MySQL Workbench, use this connection to connect to your local server.
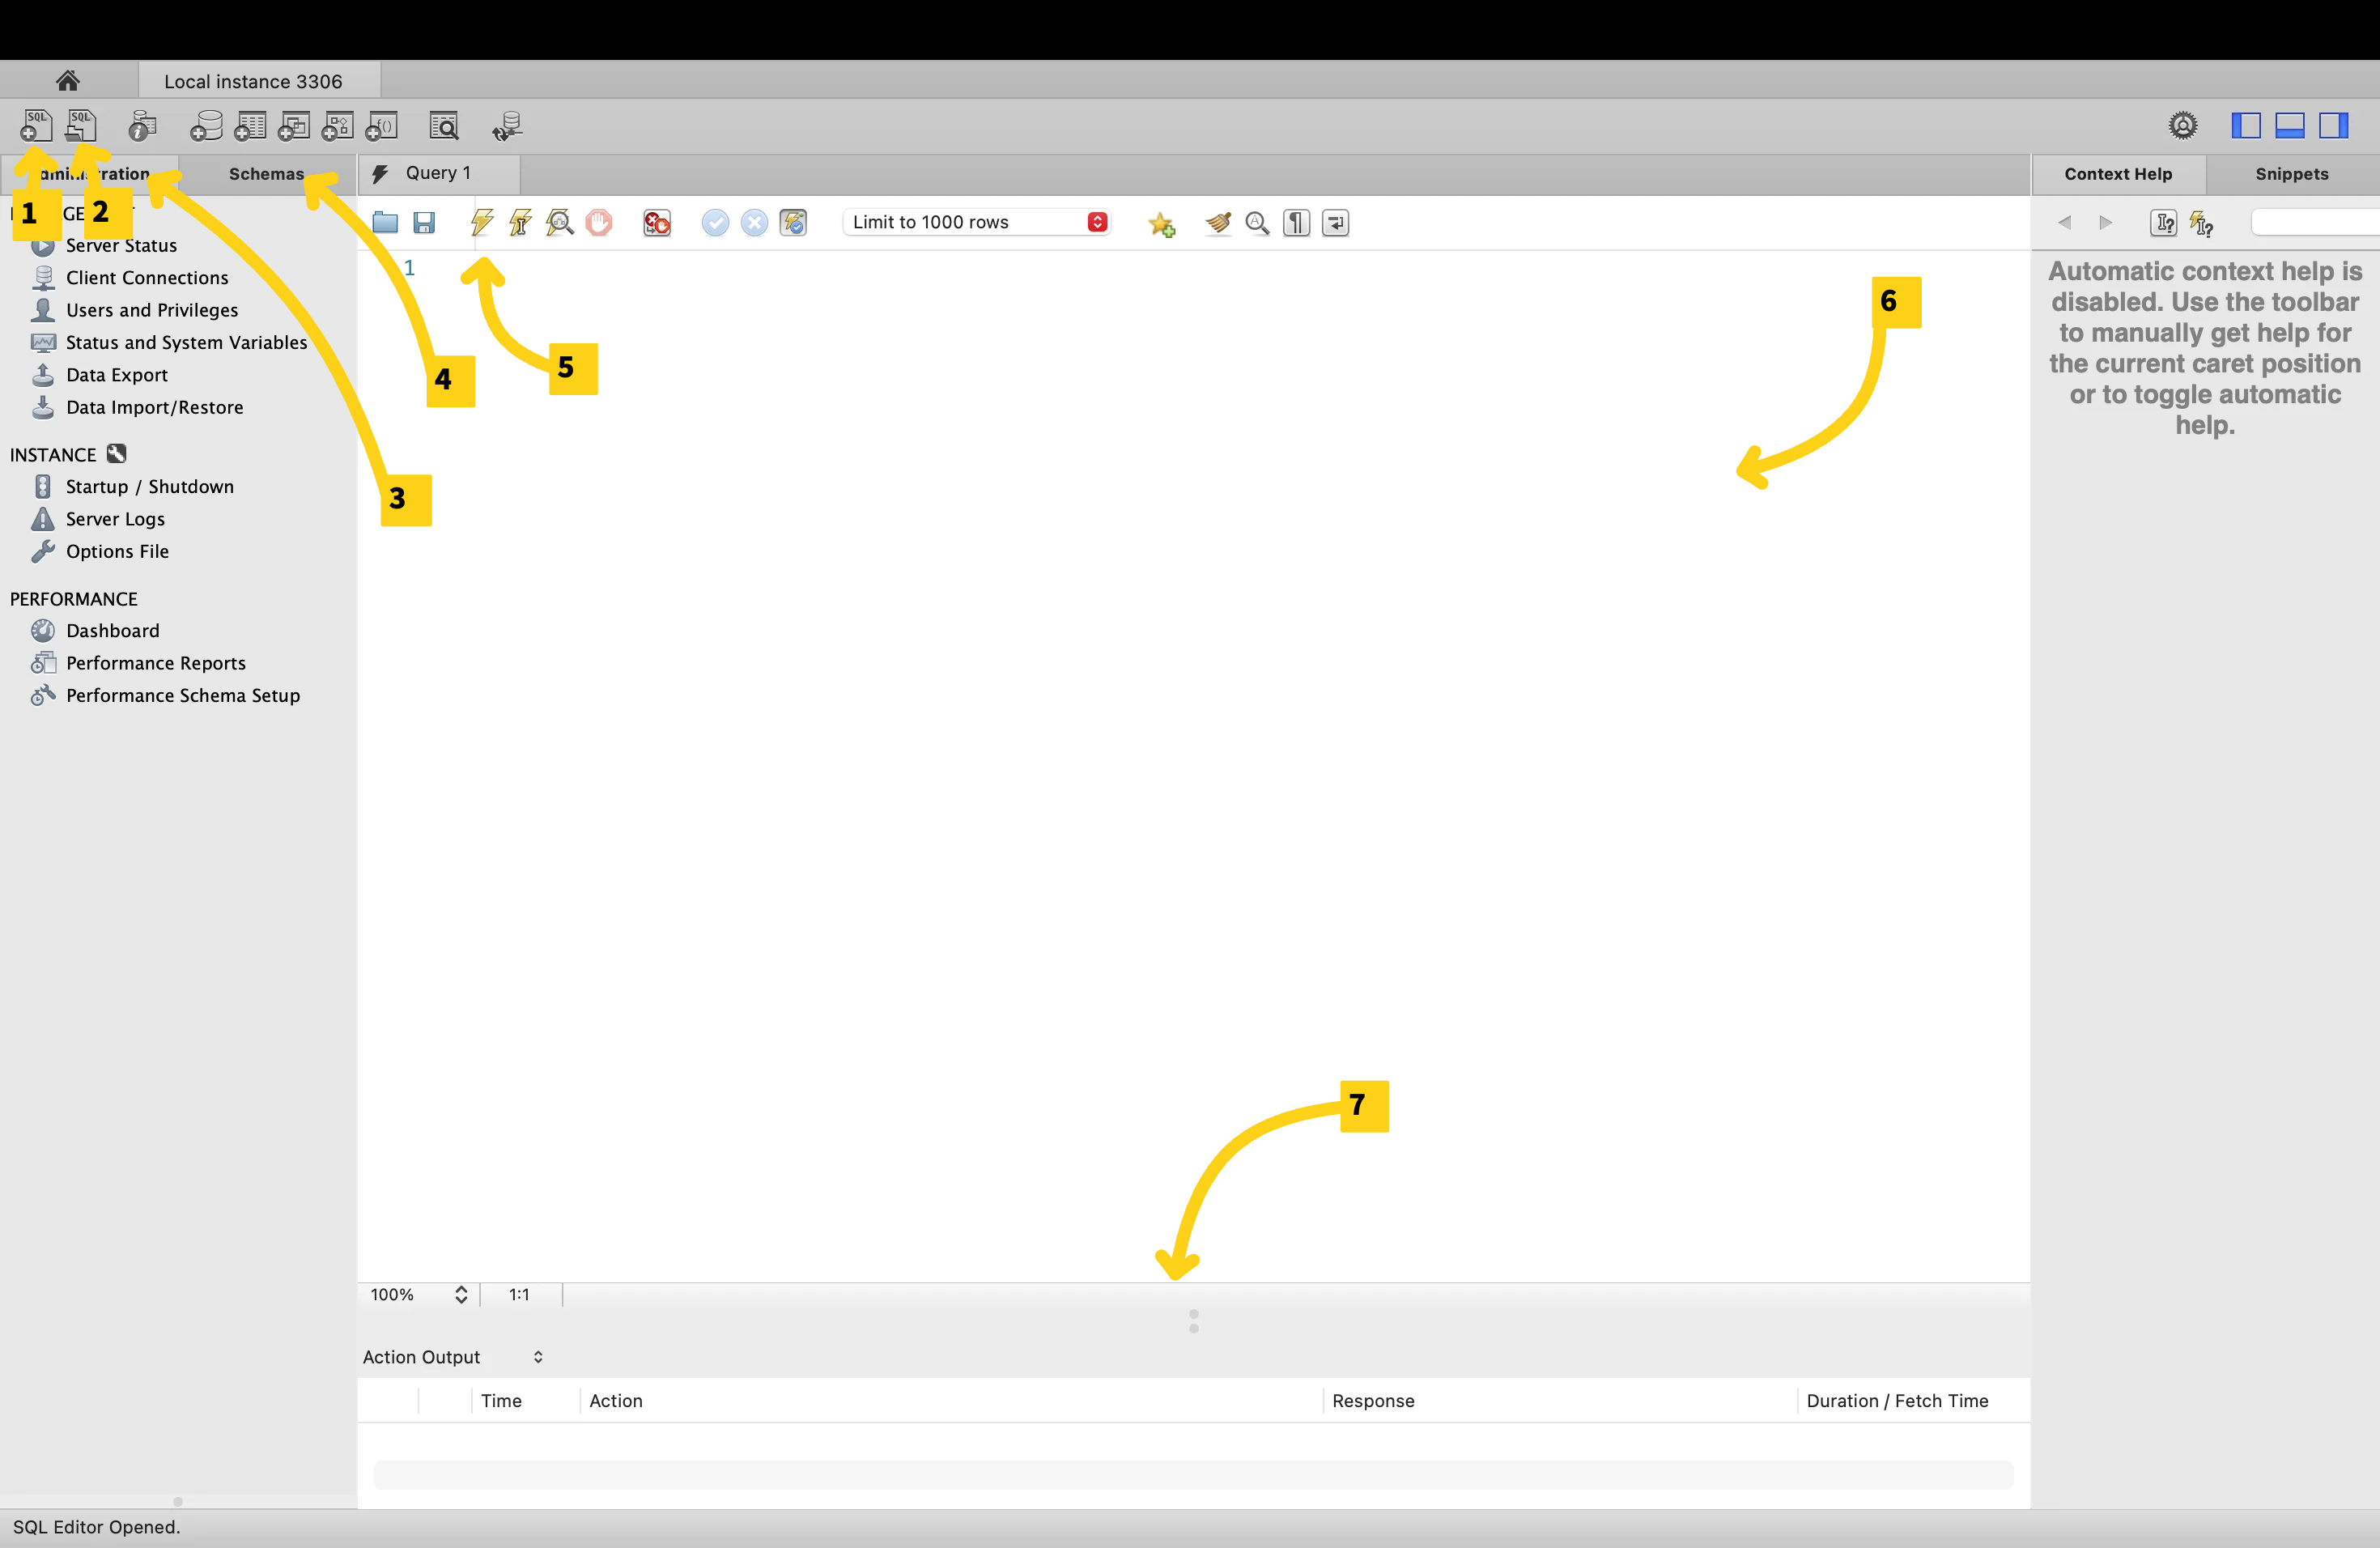
*This is MySQL Workbench on macOS. Windows will look slightly different but overall, they’re almost identical in terms of functionality*
New tab: Create a new tab for writing SQL code (queries)
Open File: Opening a SQL file
Administration tab: used to do administrative work like starting/stopping a server, importing/exporting schemas and more
Schemas tab: shows the databases that we have in the current database server. Right now, we just have sys (the database that MySQL uses internally to do its work) and maybe Sakila if you’re on Windows
Run Query: Run’s the query
Query Editor Window: where we right SQL code
Output panel/results grid: where your query results/tables will appear
Note
I will refer to some of these later on with a number in brackets (eg. (2))